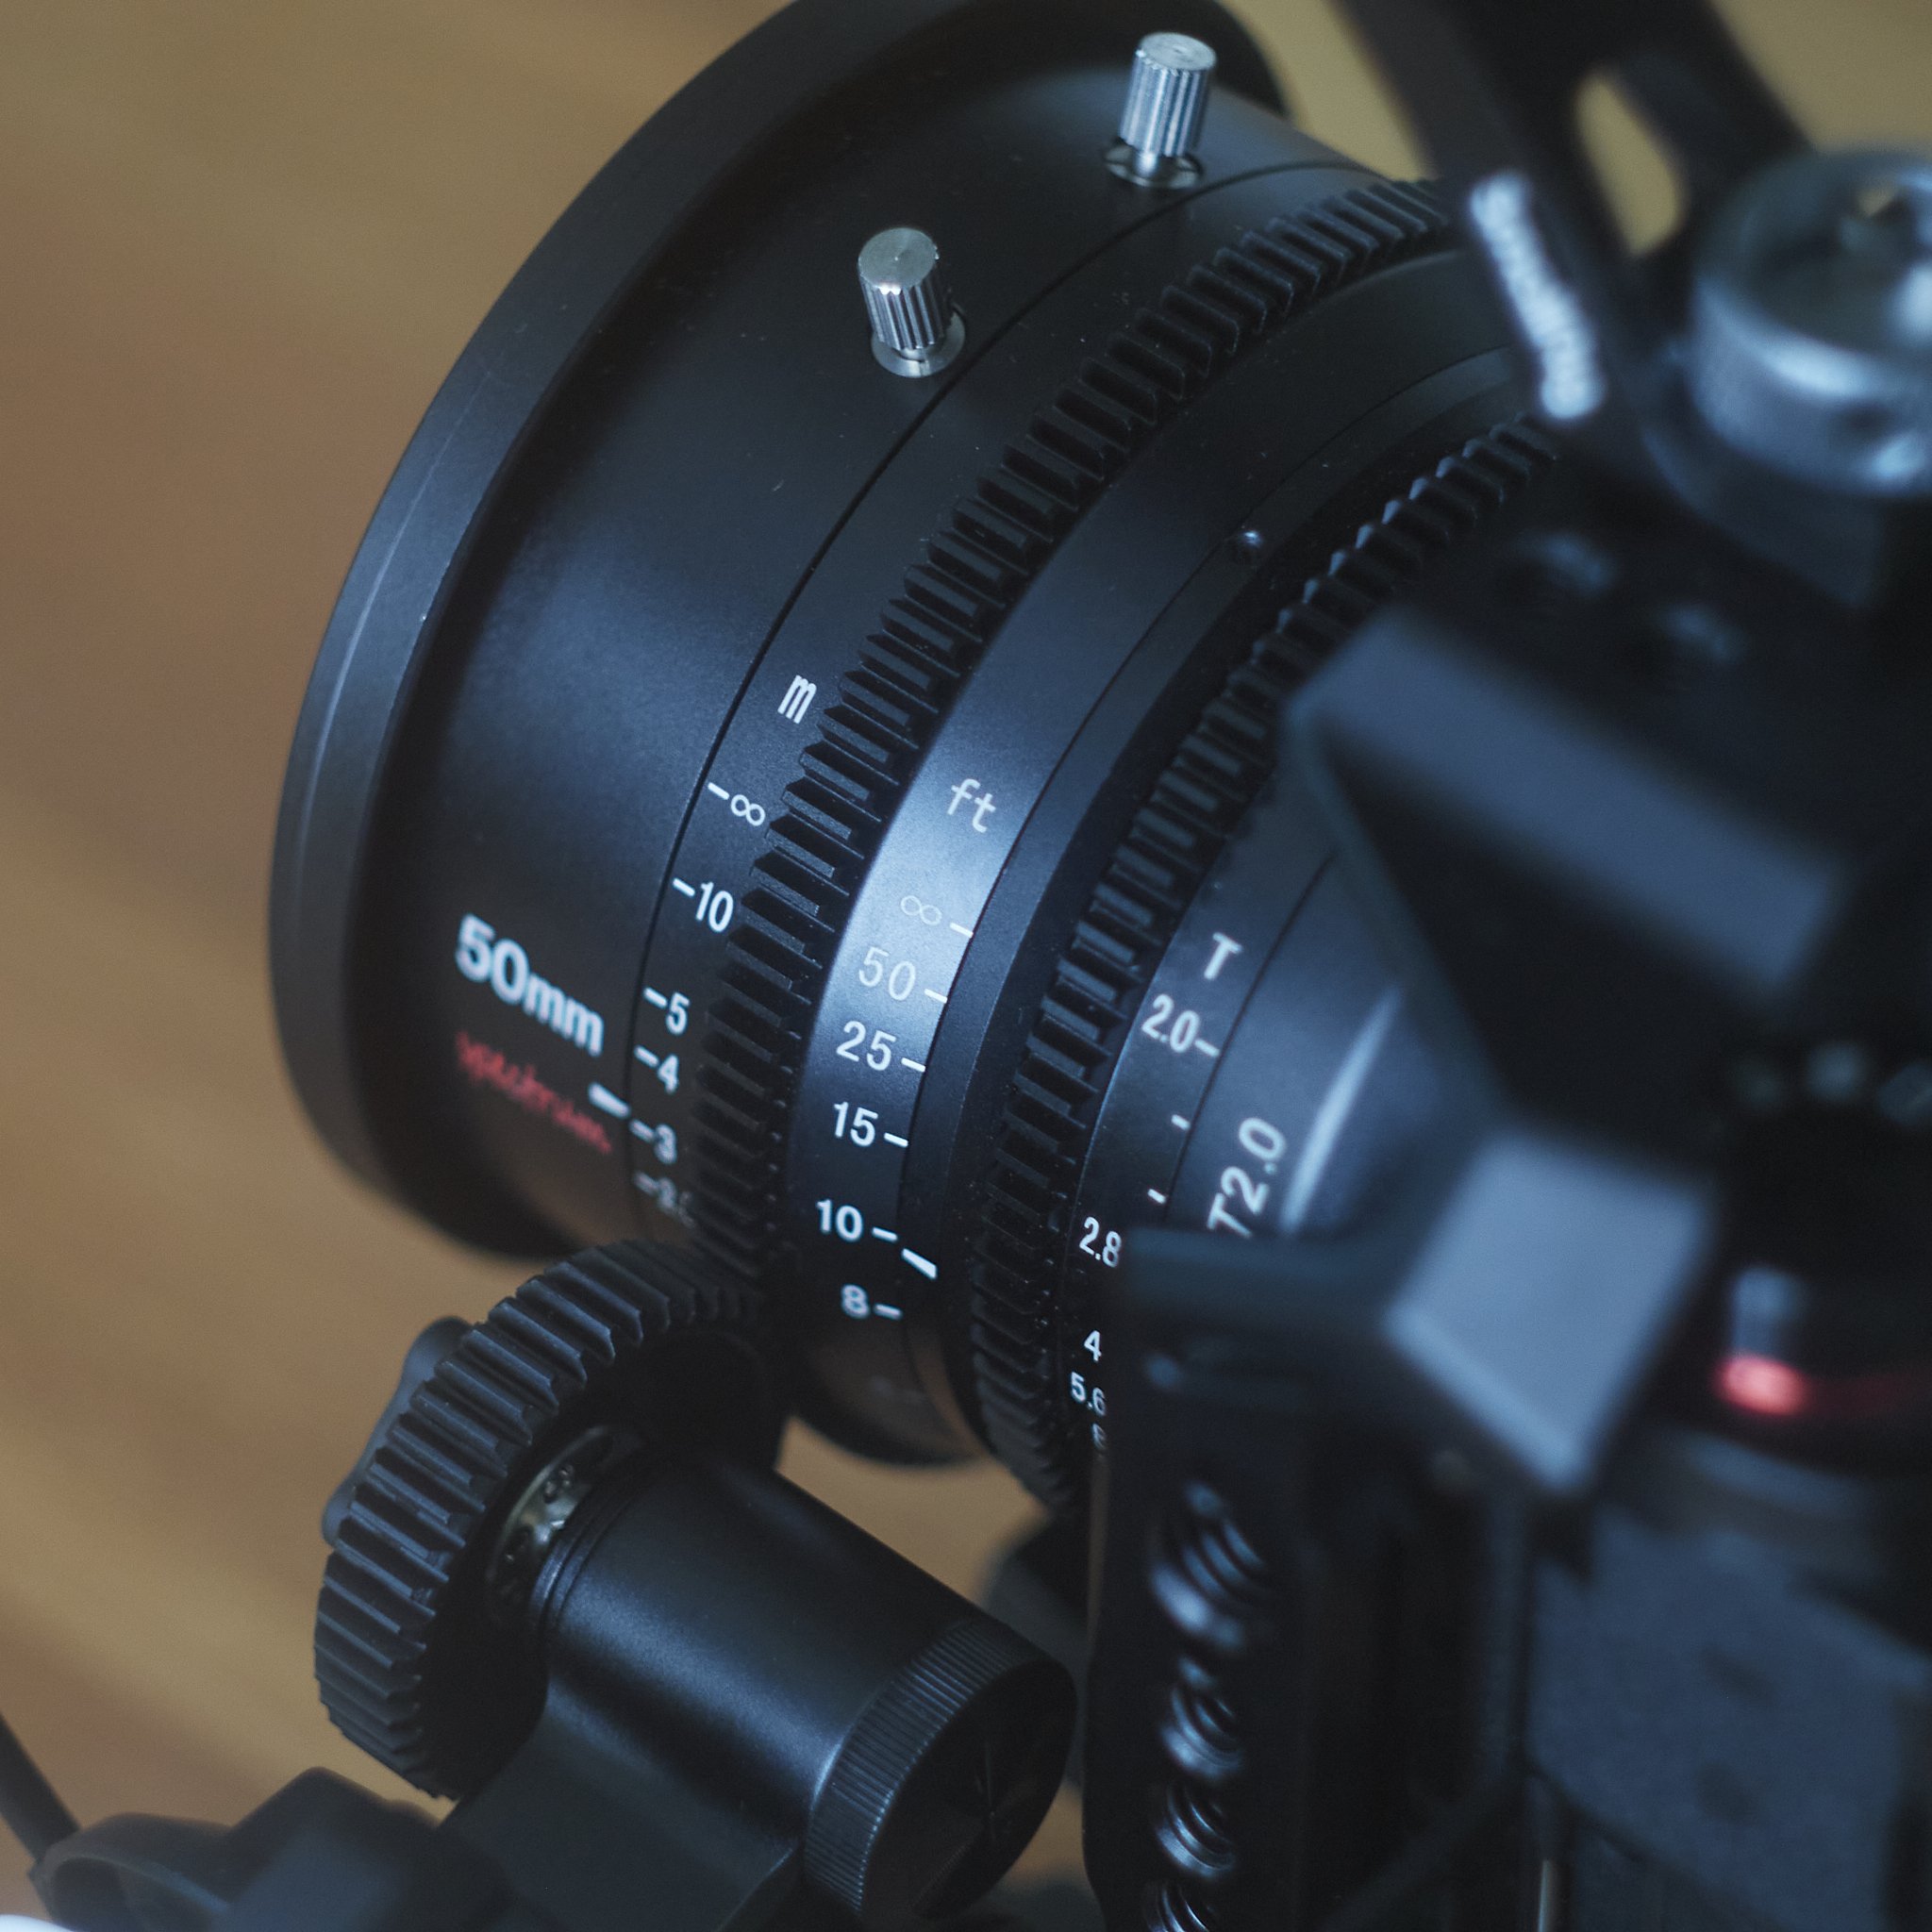
The (Many) Advantages Of Using M43 For Sport

When I went to the news paper I was issued with the holy trinity (wide, standard and tele f2.8 zoom lenses) and a monster 400 f2.8.

To be honest, it left me cold.

I had a decent portfolio of photo successes, from social events to candid travel to sports of all kinds.

I felt tsome pressure from regressing to DSLR cameras, heavy full frame lenses, vision black-out and lag. I gave it a decent go, testing my gear against the issued kit regularly and found to my surprise, the following.

When compared to the EM1x, the DSLR’s (D750, D500) felt slow and unreliable in focus aquisition, in part down to older, but not old lens designs, in part to the limitations of DSLR tech. They were perfectly usable, I was just aware of the process (slight lag, some noises) and missed occasionally used advantages like face detection were absent.

The lenses were sharp as expected, but head to head, my M43 lenses matched them, usually beat them in the corners wide open, which makes sense as Olympus and Panasonic/Leica are no mugs and the M43 format was in part chosen to make lens design easier.

The 300mm in particular is possibly the best 300 on the market, because Olympus knowns it will fill the role of the FF 600mm. It is the flagship, not just the medium grade filler of other ranges.

With football (any type), I could hand hold my 600mm, switching easily to my slung 80-300, or even a wide angle if required from a handy sling bag. With one camera and lens across my body on a Black Rapid strap and the tele zoom (40-150 f4 or 2.8) on a second body on my shoulder, I can cover the kick and the resulting mark either way it goes.

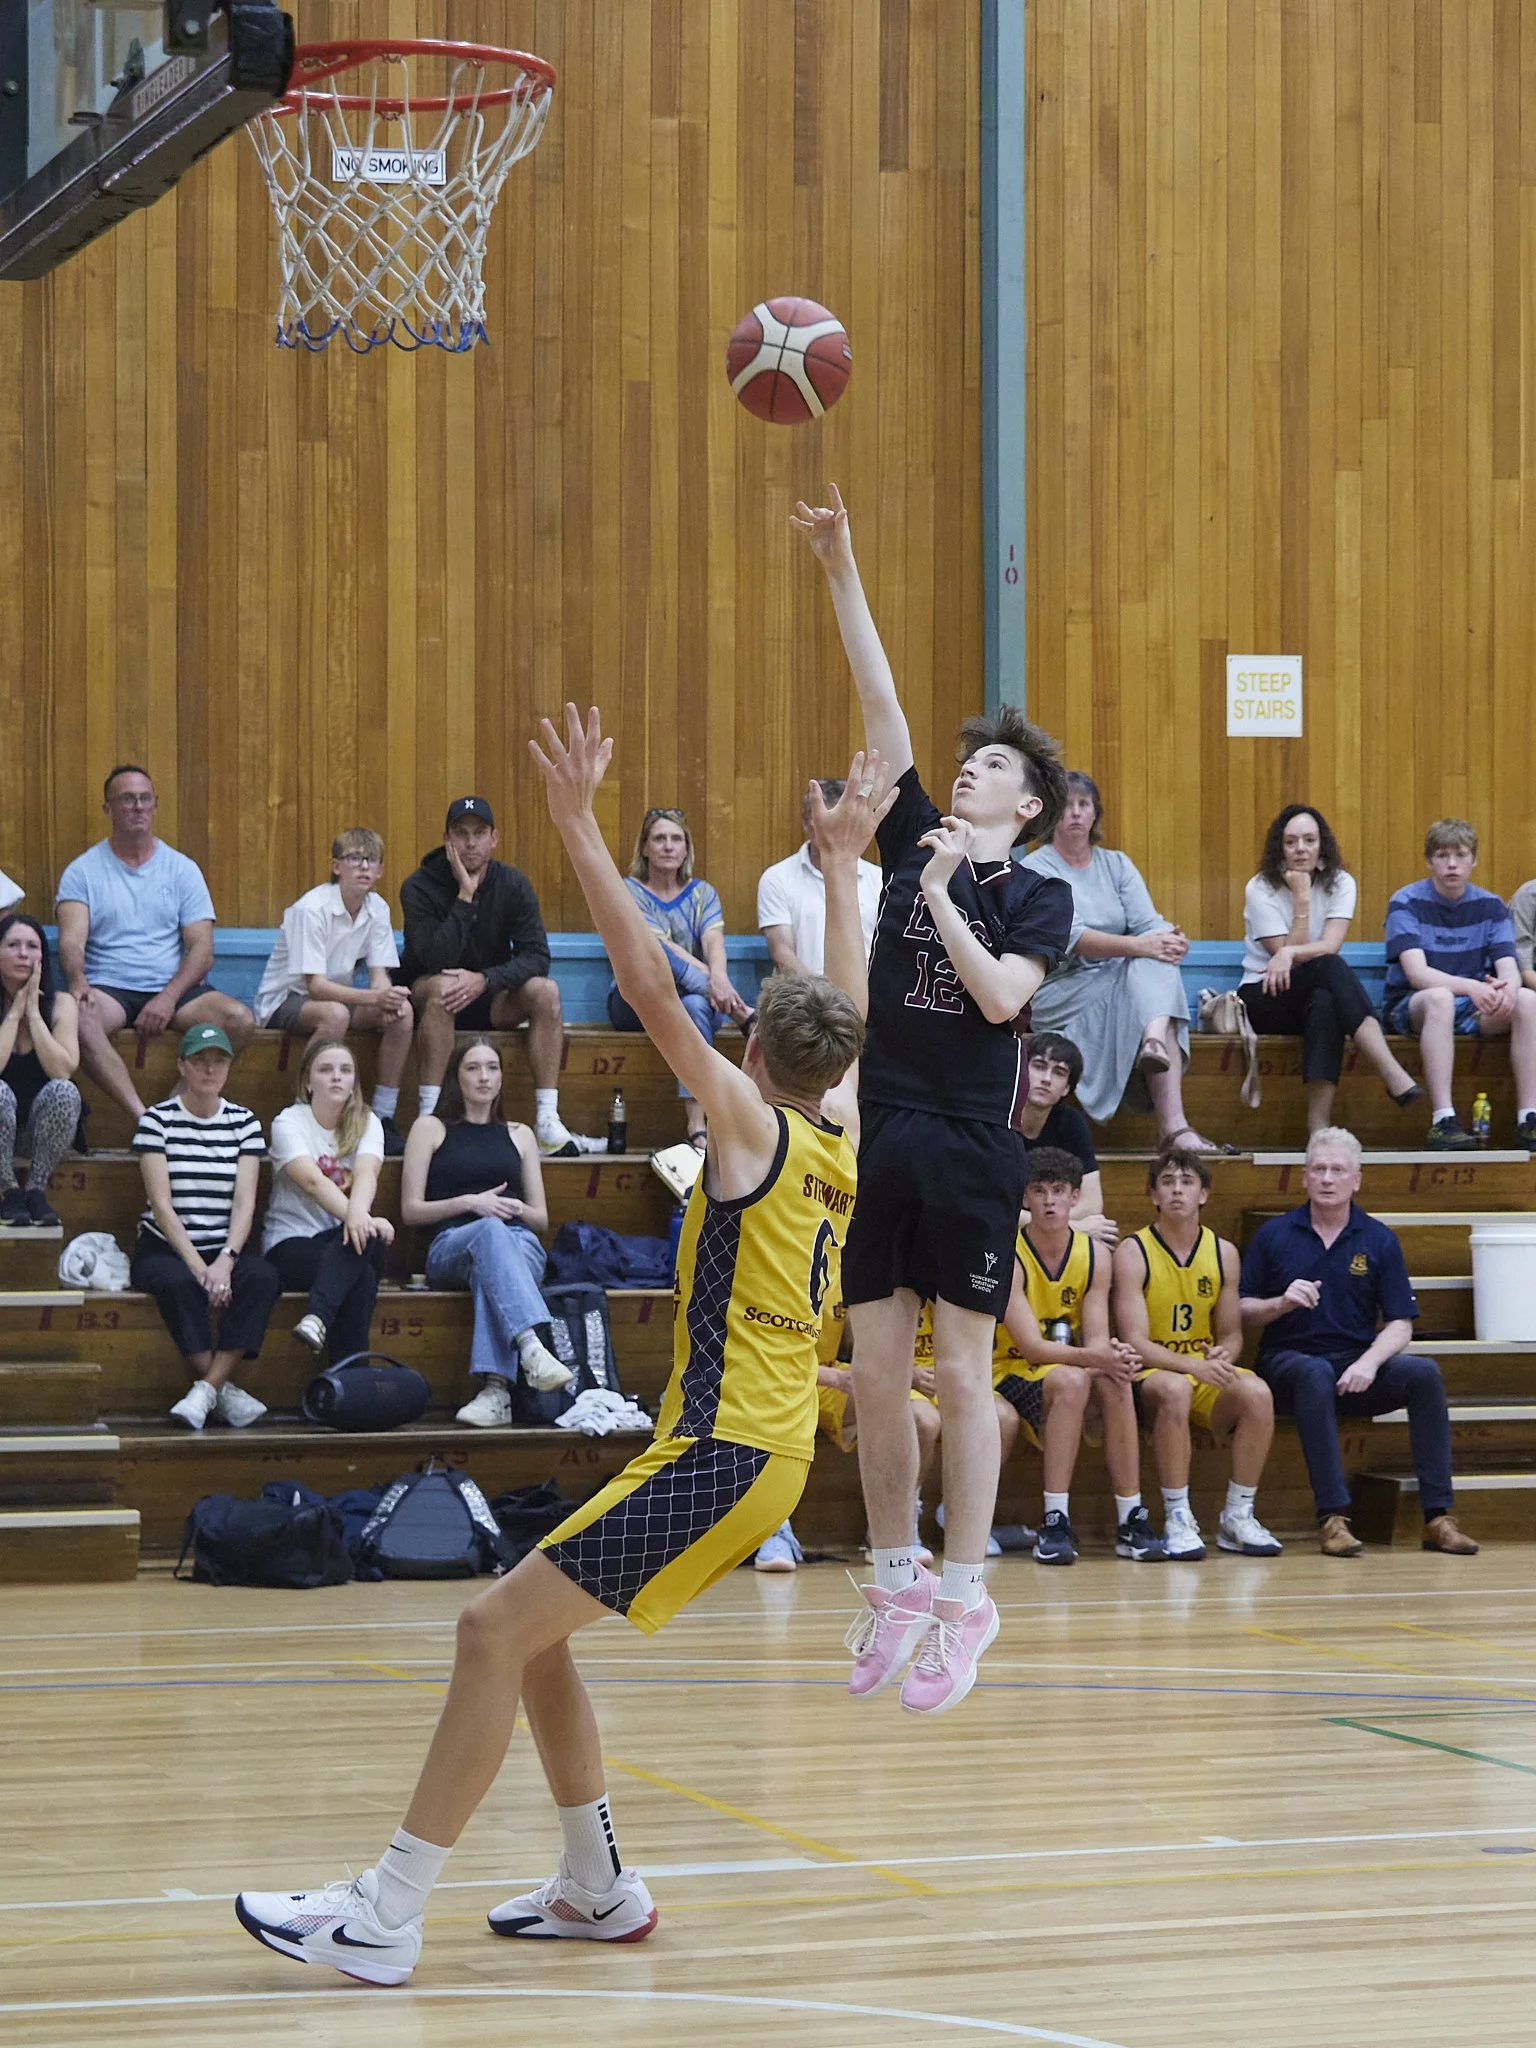
The flip side of this story is I have easy access to lenses the full frame users do not. The 150 f1.8 (75mm) that I can drop into a pocket is all I need for small court sports.

Cropped from a 75mm f1.8 image at ISO 3200 in the gloomy school gym (gets enough natural light for viewers so they leave the lights off).

The sensor sizes is where most assume the gap will widen.

Not so.

Within the parameters of what is needed in real world situations, assuming sports events are not held in coal mines with lights out, or situated half a km away, even the relatively dated EM1x sensor can always provide sharp, clean, colourful files, enough to match the full frame shooters, or at least come within the “same-same” range of other variables.

My comfortable working range is up to ISO 6400, higher is possible with an extra post processing step using ON1 NoNoise and to be clear, I am aiming for noiseless, clear, sharp and colourful images.

Not a sunny day in the tropics, this was a gloomy indoor aquatic centre on a lousy day (my regular challenge), hand held, shot between the legs of the officials standing on the blocks at ISO 6400, 300mm f4 about 1/500th.

Another from the same day.

The math of 1/500th or more at ISO 6400 with ISO 12,800 usable using f1.8 to f4 on 150-600mm lenses and still with a decent crop allowance, is the outer limit of what is ever needed. If my sensor is pushed, the lens magnification advantage often evens things out.

Sitting next to a full frame Nikon user with 500 f4, I managed to dodge the sprinklers that came on randomly, help him move when it rained and could travel from one end of the ground to another with little issue. He was seated and not moving (unless getting wet). The submitted file above was already a 50% crop from an ISO 3200 file, the one below was also possible.

I ran it through ON1 No Noise (2022), but nothing else.

The 40-150 f2.8 at national grade basketball. I have dozens of these, all bright clean and sharp.

At the near end, the 12-40 f2.8 is plenty.

The flip side of the sensor is weight, or more specifically, the lens speed to magnification to weight ratios. It did not go unnoticed by the other togs at the paper that I was mobile and angle versatile, able to react to changing conditions, shift positions, lie down, climb up, run after, work long stretches and avoid the dreaded seat many use, while matching them for results.

Which means when the action gets close, I do not have to find a home for my monster 5-600mm FF tele, I can even run the side line or go infield during breaks without putting anything down. The reality is, often these togs just leave their multi thousand dollar brute unattended while they chase shots across the field.

The system, both brands, offer a wide variety of lenses, no less than ten lenses in the mid-tele range, all decent, some spectacular.

Caught on a normal day, with only my little 40-150 f4 and a well worn EM1 Mk2, I had little trouble capturing the images needed, even getting a rare front page for sport. The one above happened within seconds of walking in the gate.

Reach speed and quality all in a daily carry lens.

At the other end of the range, the ridiculously light 9mm Leica, held one hand and manually focussed at about 3 feet and f2.8 captured plenty of crisp detail from the back of a moped.

Getting the wicket was easy enough, capturing the batsman with the full innings relevance came down to a hand zoom on a second camera.

I remember one of the other togs amazed at raindrops captured by his kit. How about sweat droplets?

Being light and fast allows for many random candids.

I could even get into pit lane and mingle without attracting attention.

Other advantages more aligned to just the brand and the cameras themselves are instant feedback and reaction time. I shoot single files, never bursts, because well, I can. I see what is coming, shoot to miss the best moment and get what I expect.

Most of my cricket images including dismissals are a matter of “if I do not see it, I caught it”.

I remember many years ago shooting single frames with a manual focus film camera (no winder). It was a matter of anticipating what was going to happen in about a second from now. These days it feels more like a nano-second.

My last day at the paper had me at a local cricket final. Under time pressure the game was slow and painfully one sided, but I still got the decisive moment thanks to responsive and powerful gear.

Then there is the very real advantage of extra depth of field.

M43 adds two stops of depth for the same reach as full frame which is to say, a 300mm behaves like a 300mm, even if it has the reach of a full frame 600mm. Sme complain about the lack of super shallow depth of field in m43 images, but it is rare to find a sports or news shooter who would turn their noses up at more depth for free.

Silent shooting and light weight (kit grade) lenses I can carry all day help with some sports. The face and club head are sharp even wide open.

I have heard all the arguments for full frame over M43, but the reality is, the savings in weight (about half), cost (about a quarter), versatility and comfort well outweigh the negatives of perceived small sensor short comings, that are mostly fictitious.

Processing is bridging gaps, real world needs are more easily met than hypothetical maximums and even when given the option, this photographer is more than happy to stick with M43 even to cover national grade events (and I own full frame gear now).

My New Anamorphic Lens.....Well Kind Of.

So, what do you get when you take a $75 Chinese super budget lens with known flaws that only covers an APS-c sensor and shoot it full frame, then add a budget (no name ebay buy) “dirty” blue streak filter, that when compared to a Moment blue cine streak is about twice as “responsive”.

I have to confess to leaving the camera on 3200k from a previous job, which was just a silly mistake and only really possible thanks to my expectation of some odd behaviour, but after some light grading, this is about as bad/good as it gets.

This behaviour is however quite interesting. Massive blue haze-flaring/CA, but again 3200k in daylight, lovely star and streak at f5.6, some funky fall-off and very sharp in the middle. Even with a cheap filter on and the wind shifting the trees, there was no frame that was completely lost to blown out flare.

No streaks because no point light source, but some pretty cool Bokeh stuff going on.

Letterboxing to follow the shape (I had no guide lines activated), this is wide open and again 3200k adjusted. The vignette is a bonus for this look.

It is not a true anamorphic (obviously), but to be honest if I had one, it would only be wheeled out for art projects and personal gigs, so this is probably more relevant in my world and has that “wet weekend” experimental feel rather than a more serious commitment of dollars into a new range.

The next lens to try if the antique 25mm Pen half frame lens on M43 (or maybe get a full frame adapter?).

Cinema Glass. Too Many (Great) Budget Choices.

Cheap cinema glass, something that has shifted from a contradiction in terms to a reality is moving fast and the benefits are many, but choices!

Too many choices.

They are getting better.

The point of cine lenses over stills lenses is a mix of things, some practical, some visual and some are maybe personal or even mental.

They should in a perfect world be matched in colour, draw, handling, mechanical connections and rendered look, but the cheaper ones sometimes do not always hit all these marks.

Colour consistency in particular seems beyond them, but oddly, if you mix brands you often can get it done. My Sirui 24 and a Vision 35mm are close in colour and look, the Sirui 35 and Vision 25 are also close.

They also use T-stops as aperture measurements, which are in theory more accurate and consistent than F-stops and are usually slower (i.e.T2 is often equal to F1.8).

Top end cine lenses should also have minimal chromatic aberration, superior flare control, distortion control, sharpness, have low focus breathing (which is where the lens effectively zooms when long focus throws are employed) and all the above mentioned characteristics. Some may be for anamorphic formats (often with unique and less than pristine visual qualities)

They do not all do everything perfectly, but when not, they provide a special something that is much loved by the knowledgeable user.

A mix of a mid range IRIX and two budget Spectrum lenses, the budget ones bought at half price, so super budget (all bought for less than the IRIX’s usual retail). I cannot see a difference in real terms.

Often the mid range cine lens (2k-ish) are close to a highly corrected stills lens from the same brand (Sony, IRIX, Canon) packaged in a cine-friendly form factor. These lenses provide high levels of good qualities, but sometimes these are too clinically perfect for some.

Usually cine lenses at any price are deliberately restrained with smoother Bokeh, slightly softer than “hard” stills lens sharpness, interesting flare control and generally an eye towards video needs over stills. This often means if you have a photo and cine lens option, you can have two looks to choose from.

Some ranges are less reliable than others, the 7Art Vision series for example which has very different looks across the range from super “filmic” soft to relatively hard sharp, while the same brand can make the Spectrum and Hope series that are quite consistently stable lens to lens.

My lens set or sets as I have two formats, defies one of the big tenets of cine lenses which is consistency within a set. It is a bit of a mess, but to be honest, it is workable, excellent value and overall has cost me less than my 300 f4…… in total.

The decision to go into L-mount pre G9.II release, the camera which would have probably stopped me especially with the GH7 following, was rewarded by some bargains last year. I got the S5, a decent kit lens, the Lumix S 50mm, a pair of 7Artisan Spectrum lenses and the IRIX 150 macro for under $4k au.

I then added a Sirui 24 Nightwalker and 7Artisan 12mm Vision for M43 (the 12mm is a good Vision lens, the Nightwalker range offered nothing at all wide). These, along with some legacy glass and plenty of stills lenses have given me plenty of choices, although the M43 set is a work in progress (see below).

Choices.

So many.

So, what do we need?

Handling is important.

A cine lens gives you smooth and click-less apertures, long throw manual focus, consistent (within a set) in ring placement for easy swapping.

Sharpness and contrast.

The general feeling in cinematography circles, the great contradiction it seems, is that as the cameras and lenses get sharper and offer higher resolution, the desire is to reduce it for a more “filmic” look, which seems to be getting stronger at the moment. It is hard to see anything produced at the moment with less than a Black Mist 1/2 strength between the lens and the viewer.

You can add filtering, use old film lenses, making the most of the good-not good qualities of that “legacy” glass or you can go to cinema lenses.

That certain something, the “X-factor” that makes your footage stand out. This is the bit where it gets interesting. It is possible, I know because I have done it, to end up with a dozen 50mm equivalent lenses* that all offer something different and suit their own projects.

Cine lenses sometimes cost a packet to be character filled over perfect or rarely both. There are clinically perfect lenses, but there are many that are easily identifiable to the initiated.

Have a look for example at a scene from the current iteration of Shogun. The frame lines are often bowed, the edges more or less blurred, the outer edges even weird looking. The use of very expensive anamorphic lenses does this and more (including strange oval Bokeh and streak flaring), which adds to the end product in the eyes of the maker.

Your take may be different and even by calling it out I may have forced you to recognise something you may have ignored otherwise, but it is real. I still remember noticing anamorphic effects on the new Star Trek movies, something I had not noticed before, but cannot un-see now.

Anyway, long way round, but back to the point.

There are so many good cine lenses out there at the moment.

At the very budget end ($0-250au), many of the budget brands below also do non-cine manual focus glass with heaps of character (i.e flaws), like the $75 TTArt 35mm f1.4 I have that looks for all the world like an anamorphic when shot full frame and heavily letter-boxed (it is not a full frame lens), or my ancient 1960’s F series Olympus half frame 25mm saved from the junk box at the shop I worked. These are almost all manual focus by design and “interesting” optically.

$75 well spent or a pointless paper weight?

Cropped to 16:9 in full frame, this lens is sharp in the middle even wide open, weird around the edges with a heavy vignette and “swirly” Bokeh, very anamorphic characteristics in the Wes Anderson camp.

The next level ($400-800), where this post is aimed, are the true “budget” cine lenses, the indie film makers entry level option, that once was a qualified choice, but now, not so much.

The 7Artisan Spectrum lenses for full frame are a consistently good choice for that cine-sharp semi retro look getting praise from many videographers like Caleb Pike, Matthew Dangyou, Anton & Co, Victor La Forteza, Dustin Abbott, Josh Sattin, Josh Cameron, Caleb Hoover, Pav SZ and more.

They are pretty stable, except for very strong colour shifts between lenses. The 35 and 50mm are noticeably different, the 50 leaning a little magenta, the other very warm. I tend to use one lens and crop to a second focal length rather than muck around in editing.

A follow focus employed using the built in gearing (the gear can be changed out for different throw). You can also control the aperture ring, or add rings to other lenses, but the one thing all the sets offer (to themselves), is identical ring placement, so you can quickly change one lens for another without changing rigging.

The Vision range is less consistent or if you like, more “character” filled.

Their new Hope range is closer to the Rodger Deakins “perfect lens” (he will then add effects later), with nearly ideal performance in all areas for the cost of a stills kit lens, except unfortunately they are still not perfectly colour matched. To be fair, my stable of Panasonic camera sensors vary as much as these lenses, so no point is being too picky, just aware.

I have the Hope 25mm T2.1 coming in M43 (and the 50mm as of a few days later). It was a no-brainer as it seems to be the best of its type, something I felt my M43 kit needed. This lens is slightly warmer than the rest of the Hope range, but my G9.II is neutral-cool in rendering like my S5, (my S5II is warmer so it is what it is).

I would have preferred it in L-mount as a 38mm in crop format (40-45mm are my true perfect focal length), but it’s not available yet. I may add the 16 and 50 also, but we will see as the other option is the L-mount 25 if it comes, matching perfectly, with two different focal lengths.

This means I have yet another 50mm equivalent, but they really are all different*.

The 50mm, a lens I tend to avoid in stills work, fits well in video. I am not keen to show the world with a bias, no introduced strangeness, overly obvious perspective effects etc. A 50mm is considered the boring middle of the lens world, a slightly portrait leaning neutral perspective, which in video means what you do with everything else matters, the lens will not save you or fight you.

Sirui has the Nightwalker range which were probably the most respected crop sensor range until the Hope series, but if you want super fast, they are still a strong contender. They even offer relatively stable anamorphic lenses for many formats. They are not “dirty” lenses, maybe too clean for some anamorphic fans, but they are ideal if you want some anamorphic benefits without painting yourself into a corner.

Different brands, but similar ideas at play.

Other budget brands I do not have, but are doing compelling options are Viltrox, Iron Glass, Rokinon/Samyang, Mieke, Vespid, Laowa, Mitakon etc, although the Sirui anamorphic range is tempting.

In the mid range ($1-3kau each), outside of the range of this post are the IRIX, Nisi, DZO, Sony, Canon, Sigma, Panasonic etc, that also often offer the same glass in stills form cheaper, but with less cine-convenience. These are closer to the “real deal” and for many enough, but seem to me to be neither one thing or the other.

To me they seem to be a compromise that is relatively pointless considering the recent boost in cheap options and the reality they still fall far short of top tier cine glass.

Many of the issues the cheaper Hope series deal with are still very real at this price point as reviewers like this have found https://www.youtube.com/watch?v=iEiStRQxBTk

My concession to this level are the cheaply bought IRIX macro and the Lumix S prime lenses designed to be true hybrid lenses and so far have proven to be. They are perfectly good stills lenses, but have some cine lens characteristics, like similar size, weight and filter size and can be programmed in camera to matching cine lens focus throw.

Sam Holland https://www.youtube.com/watch?v=_4UAqVYfWLg chose the Spectrum and Lumix S 50mm’s to ask the question “do they make a difference” and found them surprisingly close, but that was by design (ironically, everything he said about colour would have been flipped if he had chosen the respective 35mm’s).

A Sigma Art prime or Sony G Master and Spectrum lens may have shown a stronger contrast in design ideals.

Sans gear rings, they are a decent option for hybrid lenses, bettered by some stills only primes like the Sigma range https://www.dpreview.com/videos/5143042409/sigma-vs-panasonic-24mm-and-35mm-shootout and not as solid or smooth to use as cinema-built lenses.

If the Hope are as good as hoped (!), I will look at that range to go forward in both formats (M43 and maybe L-mount APS-c if available).

No matter your real needs, there are now options aplenty. Films like The Creator have shown that cheap cameras can make full Hollywood grade movies and that crew used a few relatively cheap classic 75mm Kowa and Atlas Mercury lenses, as well as some Soviet Iron Glass rehoused antique stills lenses, proving also that budget lenses are also an option.

*my 50mm options, a focal length I seem drawn to.

  1. Olympus 25mm which is stable and lush, actually closer to a 45mm in reality.

  2. Olympus antique 25mm f2.8 half frame with muted colour, funky Bokeh and flare.

  3. Olympus 12-40 f2.8 at 25. A nice organic looking lens and a good match to a Pana sensor.

  4. Panasonic 12-60 Leica. A slightly brighter and more modern-cleaner version of above, my best AF/stabe option for video.

  5. Lumix 50 S slightly warm and modern stills/video balanced.

  6. Lumix 35 S (as crop frame 50), cooler but similar to the 50mm.

  7. 7 Artisans Spectrum 50 neutral colour and cinematic smoothness.

  8. 7Artisans Spectrum 35 (as crop frame 50) warmer coloured version of above.

  9. Pentax 50 f1.4 SMC which although legendary is an odd one for me.

  10. Helios 58-42 in L mount. That old pearl. Mine has oil on the blades but works fine. This is one of the stars of the Iron Glass range.

  11. TTart 35 f1.4 (for crop frame, but used on full and not a cine lens), a decent anamorphic clone when heavily letter-boxed. This one needs a follow focus as its focus ring is tiny and hard to reach and the 37mm filter size is a pain (looks hilarious with a mat box on).

  12. 25mm 7Artisans Hope series, probably my best “clean” cine lens option outside of another IRIX, but unseen as yet.

  13. Sirui 24 Nightwalker, a very fast and decently corrected cine lens, probably beaten by the Hope lens above for quality, but faster and different in rendering.

  14. Several other zooms, but no standouts in either M43 or full frame.

The Problem With YouTube.

YouTube is probably the main source of information available to the majority of us these days.

The printed book, weekly or monthly magazine I drew from is a thing of myth (bought a copy of “American Cinematographer” the other day out of the blue and enjoyed it, but at $17au, I can see why relatively free YouTube wins most of the time).

This has a ton of issues.

YouTube is like Wikipedia.

There are no information police, no true editors, little awareness or enforcement of standards, so you get good and bad information (often at the same time), terminology that can be misleading, lies told, good information lost in the roar, agendas championed.

YouTube is an open forum powered by popularity algorithms, presentation and the illusion of correctly understood information being shared, but it is not fact checked. I worked in retail for a long time and the reality was, the best salesmen were usually not the best educators or the most morally adjusted of us.

My pet peeve at the moment is the miss-use of depth of field/aperture terminology. I cringe when the raft of popular videographers in particular use depth of field terms incorrectly (like using the term “more (of a) depth of field”, but actually meaning “more more pronounced shallow depth of field effect”, when more depth would actually mean well… .more or deeper depth of field). Saying “stop down to a smaller aperture”, because of misidentifying smaller aperture numbers as being smaller, which are actually wider aperture holes etc. It is getting so bad, I feel the actual physics of it are semi-redundant and the new terminology is taking over*.

This image displays the effect of “shallow depth of field”, not “more of a depth of field”, which is actually not a thing.

The big issue here is they all listen to each other in a loop of self justifying error so the inaccuracies become lore and the poor confused viewer then reads something like an actual instruction manual and gets the other (true) version, making the already tough to understand near impossible. Is it right that the more popular face on YouTube will often win out over the cold hard truth in text?

*

You need to “play the game”.

The presenter is forced to play the “catch word” game to get noticed, using clever terms and trigger words. If you do not play the game, if you use literal or information based titles, your video will never launch. If you use the promise of easy gain, the fear of impending doom or simply entice with clever confusion, you will do better than relying on truth.

“Ten must do tips”, “You are doing this wrong”, “Why you are failing” or “How to guarantee success” and many, many other over the top pseudo-headlines may get you hits and grab the attention of viewers, but you had better follow that up with something real and true or be aware of the harm you are causing.

This is always a part of something, but as speed of adoption and retention equals income generation, the reality is you need a big hook to catch a lot of little fish. No decent book was without a title and even catchy cover picture, but the correct assumption from the buyer should be all books would at least be proof read, fact checked and edited to some extend. They were expensive to produce and taken seriously, so needed some standards. Even magazines are/were accurate, concise and informative.

There are many good presenters and I personally learned a lot from them, but there is also a huge trap of personal opinion, flawed testing regimes, parroting innacuracies, paid sponsorship and bias.

I am lucky in that I have a long back story of learning from accurate and reliable sources and sometimes teaching these to fall back on, but this does not help much when half a class of students want to argue the point, citing a bunch of more popular than me “experts” on YouTube, who, legitimised by the format clearly, apparently know more than me and those I learned from, when most were not born when I learned it correctly.

I do not “play the game” so I have no skin in the information dissemination world. I just have to see physics bastardised, photography and video terms twisted and changed to suit an often uninformed presenter’s use.

*

It is limited, unfulfilling and hard work.

The format is limited in time, attention holding and completely reliant on the care factor and honourable intentions of the presenter.

As well intentioned and informative as many presenters are, they still have to “give a crap” enough to do the work. It is hard and often unrewarding, which is a shame as the presenters with the most to give often cut and run when the reality of it all settles.

I get it, I often stop blogging for long periods because other things get in the way or I simply have nothing to say, but for YouTubers, often under pressure to produce, even pressure from sponsors, it must get dark and heavy some times and it takes a lot more to do.

No wonder so many good YouTubes fall away. Integrity, genuine pride in their work and a desire to get it right are all swimming against the tide.

It is an ever tightening funnel of limited perspective.

I am always surprised how a format with almost unlimited potential for input growth often has little of use to say on an important subject. I guess I need to ask the right questions and accept the answers given? Even in my other hobbies it is often easier to dredge up an old magazine article than search the web.

The sad fact is, gear reviews get the most hits, but often tell us the least. On this blog, my Domke and Filson bag reviews are by far my most viewed and cynically, even though I generate no income from this site, I did post them to address the shortfall of information I found myself and to get more hits.

Staying the course of truth and avoiding bias, when it is built into the system is hard and often pointless.

*

I am left to wonder where are we headed?

Fake news is the norm, words for money are standard, greed over generosity always a threat, with few if any other options to turn to. Are we tainting a generation of talented young replacements, bending them to a will and perspective they do not even see as tainted, or does it even matter. If they use the wrong terms, but get the right result, is it any different to someone using a second language incorrectly, but getting the idea none-the-less?

Since the first words were printed, sharing of accurate information has been possible and created the world we now live in (well some of us), but it has never been for free and it has always had it’s falsehoods. Nothing written or read has ever been completely without bias or a required perspective, much of it is outright lies, so maybe we just need to hope that the best of us will rise above it as we have in the past.

*More depth of field is deeper depth of field i.e. more depth of field or in focus area which is a smaller number, which is also less light, which is also called stopping down, or closing the aperture. Not a suggestion, fact.

Video Avalanche!

Well, not really, but stuff happening.

Well, careful what you wish for.

The school junior music faculty asked the other day if I could do a multi cam, multi mic performance of their year 5’s as the school gym is out of action when needed (a casualty of a major building project), so the fairly large group needs to be projected on screen. Three groups at once, same space, different locations, so handy or fraught depending on how you look at it.

I get a practice day so sound mainly, maybe even a safety track, then stills for camera angles.

I have the cams (the two S5’s and one G9 mk1 will be static, the G9.2 moving).

I have the mics, probably paired (or single) Lewitts per group, the LCT 240 or 040 match condenser for vocal/overhead and the MTP 440’s for ‘harder’ instruments. There will be a “modern” group, a Xylophone group and vocalists.

The H8 will get the lot, but I will backup the whole room with the SSH-6 mid-side shotgun into the F1/H5 (or the H8) as a safety net (RAW audio so easy to adjust).

This job is not about lighting, it will be what it is, but sound and putting together a 4 cam monster will give me plenty to do.

After getting my head around the first true multi camera, multi mic job that finally justifies my purchases and plans for these, I got a short notice repeat of a jb I did a few years ago to video some boarding house students.

Lighting has been on my mind.

Luc Forsyth recently posted a video on the difficulty of mimicking that “Netflix” doco light https://www.youtube.com/watch?v=_2opzk8PAIE and I noticed something that had been on my mind and was coincidentally followed up by a documentary, a very slick “Ken Burns” style one that used soft light against a very deeply black/grey background. The thing that got me was the “flatness” of the softness.

In the Forsyth video, after over four hours of working on the scene, he realised the main difference between his work and the supplied samples was one if brilliance, even to the point of hot spots on the subjects. It gave then a liveliness and brilliance that made them stand out.

He used a large soft box, the originals look like large LED panels, possibly bare as the hot spots are clearly rectangular.

I have options, lots and lots of options, lots and lots of ideas, but I need to test some stuff and now, because I shoot tomorrow.

Very quick and dirty test using the “great white hope”, my Smallrig lantern md on the front of a 80w lamp at 50%. Big mod on a big arm, C-stand and weights etc. Nice result considering a shitty set-up (I put the rest in place in my mind). The cam is at ISO 3200, f1.8 1/125th, so stills settings, not video. I feel this will work well for a pair of subjects, a little further forward and a bit more grunt.

Getting more realistic, as I have 5 bags to carry already, this is the same light, same settings into a Westcott bounce brolly.

My old fall-backs, that to be honest seem to do 70-80% of my work, the Godox white shoot-through (or bounce) brollies. Cheap as chips and my oldest mods, these just give. Obviously at the same settings, too hot, but less power means less heat.

Normalising the camera to video settings (50% light, ISO 800, 2.8, 1/50th), I think the cheap and simple shoot through gives me good open colour, but also some brilliance. I will use a warm hair light motivated by a warm point light behind, some other fake lamps etc, but otherwise a winner and it only needs a light weight stand, can be a little further back and is very efficient. For two people, I will bring the light closer to straight.

With a direct comparison below, the bounce brolly has more “bite” and seems to open shadows (behind) more, but it is also closer as you can see in the handy TV reflection. I may take both, just in case, the refelctor having the advantage of self flagging with a solid backing.

Ed. It happened, it worked and the system was superb.

The single brolly modified light maybe needed some flagging or the reflector model used with feathering to darken the background, but apart from that, the lights (1x 80w Selens COB on 50%, that did not even get warm over an hour, 2 little tubes that were still at 80% battery after same, some little christmas lights and a Weelite RB9 as hair light (motivated by the little tubes), were also on near full battery after an hour of 50% power.

Comfortable subjects, consistent light and processes.

The S5 in 1080/422/10bit/Flat, with 7Artisans 35mm in APSC crop (50mm), Neewer 1/8 mist filter on the mat box, Sennheisser MKE-600 on a low ifootage stand in front into my little Zoom AMS-24 interface and then the camera, all worked faultlessly. The S5 runs neutral-cool in colour, the 35mm is warmer, balancing both out (The S5.II and 50mm do the same backwards).

Over 1hr of footage needing to be broken down to about 15 mins, then a few minutes for a promo video, but plenty to work with. Focus, using the eye cup extender was a little difficult to be sure of out to the edges. I actually thought it was the lens, then realised it got better as I moved my eye around and recording on a tripod I was not super keen to push in too close, so maybe I need to look at that.

Oh and I missed that the mike tip was visible in the lower foreground, disguised by the first sitters dark pants, then I had to leave it for the next two pairs, so a mild crop to start proceedings.

Road Paved With Silver.

The Silver Temple or Higashiyama Jisho-ji is at the starting point of the Philosopher’s Path Kyoto.

It is one of the most photogenic of all the temples I have visited.

Enough words, just images now.

Any Regrets?

Leaving the paper was for me, a necessity. The only time I have not enjoyed my photographic journey, apart from the odd bit of fatigue that we all get, was at the paper.

The combination of poor integration, zero feedback, self doubt, imposter syndrome even, fuelled by choosing to just not fit the “mould”, missing my previous life at the school and little connection to either the paper or the subject matter meant leaving or giving it all up totally.

There were fun times of course.

I enjoyed the sports team and they were different to the general editorial pool to work with. The subject matter was generally more interesting, the work routine more natural to me and some specific sports would become favourites. Oddly, those sports were often not the ones I would choose to watch, which turned out almost universally to be boring to shoot.

The JackJumpers games in particular were a highlight both photographically and a decent representation of my work. The other togs were keen to have me only shoot what they called the “minimum required” and get out early, which was an ongoing theme.

The sports team on the other hand were hungry for images, as we in the state’s north only got a few games a season and the resulting images needed to last us the season, or as it turned out when we won the national championships, the whole year.

Great games, great atmosphere and I actually learned most of the names, so a captioning no-brainer.

It is still cool that even a year after leaving and eighteen months since my last game, my images still pop up regularly in the paper. Reward for ignoring the advice of the other jaded togs and taking and captioning dozens of images, not just a handful.

I did however, have mixed feelings when the team visited the school today.

Will Magnay, JackJumpers and Australian Olympic rep.

I miss little from the paper, but I do miss some of the sport, the JJ’s in particular.

No regrets though, I have done that, been there and have plenty to do now.

I also firmly believe sports and all other passions are worth documenting at any level. These people at the top get the attention they deserve, but how much effect can an image of a similar calibre have for a young budding star, or even an on-the-fence try hard looking for a reason to keep going.

Shooting at the top level gives you national attention, but gets lost in the tidal wave of content. Getting a decent shot of that 3rd division under 13 battler, or the second row from the back extra in the junior school production genuinely affects that person and those close to them.

I think I actually prefer that.

Of Orange Gates And Tourists Hoards.

I am a tourist like every other foreign traveller with no real vested interest in the places I visit.

We can delude ourselves we are special, more caring, less selfish, more in tune with the place and maybe after nine trips to Japan, I am a little more attuned to the people and place, but with this comes an awareness of the massive understanding gap that still exists.

Our first day in Kyoto was weather compelled, which forced a late change to our plans, our intended first day (Tofuku-Ji temple and Fushimi Inari shrine) were instead tackled on day two. Still wet, still hot, but time to crack on.

We caught the start of the high season, which tends to be Spring and Autumn thanks to the beauty of blossoms or turning foliage and avoiding the excessive heat in summer or bitter cold of winter, so lots of tourists were not a huge surprise, but the numbers on this less than conducive day were still a surprise.

Umbrellas effectively double everyone’s footprint as well, not helping the crush.

We all have a right and I did feel for the local travellers, their connection to this special and holy place must have been under strain to some extent.

Tofuku-ji, not featured in this post, was about what we expected, with plenty of wedding couples, some tourism shoots and actual tourists, but a large and gentle place, so room for everyone.

Not sure of the dynamic here, maybe a pre, post or actual wedding day shoot, maybe a modelled sample or simply a tourism shoot, but either way the party showed great patience and generosity sharing the space, not that they had much choice.

So, how do you tackle a location.with a massively focussed visitor pool and limited space?

First, you need to be realistic and patient.

The lower parts were crowded, claustrophobic even, the crowds all clambering for that elusive tunnel shot, most with little idea of what to expect.

If you cannot avoid people, then take what is on offer that may actually add to the place.

Be open to all options available.

At one point, the tight crowds are split into two paths, so shooting from one side to the other allows some decent shots.

You can also pick out details, something I always find natural and exciting.

The different stages of maintenance help certain poles “pop”.

As the crowds thin out, inevitable in the heat as the climb is decent and the numbers below off-putting to many, there are rare opportunities to get empty pathway.

After the second section of larger gates, the main cemetery is reached and the crowds become small knots of people interspersed amongst cold stone monuments with contrasting orange features.

At the top, the view is decent, but not overly photogenic.

The cleverly placed guide shows the way to the true top of the mountain only a short walk away, otherwise, it is back down again.

Go forth……or not.

And finally, some more detail and context shots on the way back.

Quite happy with the optical qualities of the kit Panasonic 12-60, Bokeh may be a little Ni-Sen (cross-eyed), but admittedly a torture test shot.

As Spielberg found with the making of Jaws when the mechanical shark failed to cooperate, sometimes a little is more powerful than a lot.

The pride of oiur gardens tends to be just another plant in it’s native habitat.

As a final note, I found the 2:1 and 1:2 formats helped a lot. The usual formats usual in modern cameras (2:3, 4:3), tend to retain too much information to cut out unwanted clutter. Several of these shots have ugly high or populated low elements that were avoided. My other favoured format, square, may also have worked.

Maybe going in winter or high summer would allow more room, but with these come other issues, so as I find myself saying more and more as I get older, “it is what it is”, no more no less.

Don't Forget, Everyone Is Afraid.

Seriously, greed, aggression, hatred, suspicion are all driven by fear. If you have no fear, then the root cause of these drivers goes away. Greed comes from a fear of powerlessness or irrelevance, hatred and suspicion also come from fear of the unknown. Aggression is the implementation of one way of fixing these percieved problems.

When you next meet someone who rubs you up the wrong way, derides you or disrespects the things you hold dear, try to remember their base instincts, their “Lizard brain” is driving them.

Fear creates monsters, often where they do not exist.

Understanding that frees you from their grip.

Seeing it in others, helps understanding and grants compassion.

Knowing that should not be abused.

This post has been hanging around for a while, just needing some gentle images to complete it.

Himeji, The Land Of Rock And Sunshine

Three trips to Himeji and three perfect days. I guess it must rain there, but it seems almost fanciful to us.

It is hard to fail with this place, a truly perfect castle and grounds.

The true gems lie in the details of this truly magnificent working monument.

Especially the gun ports, a favourite subject of mine.

It is however a place of contradiction, the ultimate old meets new flag bearer for Japan.

The parade ground being prepared for a massive rock concert.

No escaping something was going on.

Not the view of their ancestors. The end of the boulevard in the distance is the train station, making this a no-brainer to find.

What Is In A Shape.

What is in a shape?

In photography, the shape of an image tends to be forced on us by sensor shape or printing limits and is accepted by us as provided, even to the point of miss guided ideals espoused like “never crop” drawn from it.

My question is, why?

The shape you choose should be based on the way you see your subject and the way you want it to be seen, nothing else

For Japan this time, I chose to shoot 2:1 “cinematic”, occassionally 1:2 “wall hanging” shapes.

Shooting my images in RAW meant of course, all the images were 4:3 format, so to enforce the continuity of the process, I imported them with these shapes as pre-sets and shot with the excellent crop preview on the G9.

I have faith in my original compositions and intent to hold the course. I do see other shapes in some images, but it is interesting how few are equal or better with more. Even more interesting is the few times I am tempted to break the consistency is to use square format, the “other” true format.

Part of my thinking is linked to the desire to blend cinematic shot composing with stills composition, because they are linked and add to the quality of both.

The shape was easy to compose with, with the added benefit of cropping out unwanted foreground elements (often tourists heads) and refreshed my take on the well frequented locations we visited.

With the 2:3 ratio. 35mm film shape dominating the last half century, we have been pandering to that less than ideal shape along with older, squarer formats for printing, but ascetically, wide screen suits our two eyes better and square is the most equitable and versatile of formats for print.

Another small benefit was horizon alignment, an issue of mine. I was more aware of it, because basically, I had to set my horizontals firmly.

Still not perfect, because sometimes the subject isn't, but better than my usual effort.

Placement is also interesting. I felt keener to break or bend compostional rules a little, the "golden mean" meaning little.

What is in a shape?

What ever you need it to be, even if that is the abomination that is the vertical 16:9 “reel” format.

Japan Done, New Lessons Learned And Old Ones Re-learned

The Japan trip was a success overall. The places we went were known to us, but the the trip was part tour for friends and part holiday in a familiar space.

I decided to change up my usual work processes, trying to bring something new to a well known subject and on the whole and in response to different priorities, it was a mostly successful.

Switching from Olympus to Panasonic colours, timed ideally with late summer flat greens as it goes, imposing the 2:1, sometimes 1:2 format constraint* and less reliance on discreet street gear, gave me a more “general purpose” setup, with a freedom and ease of shooting close to that of my day job.

The images below are mostly taken from the first two days in the city or at Tofuku-ji temple.

The G9 handles easily and quickly, but the AF was not as sure footed as the Oly cams. It is an interesting difference in work dynamic. The great customisation and control of the G9 mk1, with a button or dial for everything, can mean some over complication and the need to feel your way to the best settings. An example of this was my early preference for the small box cluster focus grouping, until the early rain fooled it more often than not.

Lots of this and when heavy enough, the small box cluster was to be praised for it's sensitivity, but not it's choices. Changing to the dynamic box helped, lesson learned.

By the end, my see-shoot-continue one-action action was back in play, but I know I missed a few shots early on. This was in stark contrast to the many mobile phone shooters who, even with the benefit of using the best known camera they have likely ever owned, often took an age toget a shot.

The difference between a professional photographer and a snapping tourist is still there for now, much as it always has been, in focussed and efficient processes, filling raised expectations and with an awareness of comprehension and action, not the gear. I noticed a few other pro shooters, always obvious by their ready-to-go organisation and speed of operation.

The 12-60 kit Pana lens was a winner all around.

Versatile, optically solid, great range including macro and weather sealed, meant I used it for 90% of the time, only really switching out for light night/street/shopping trips, when the Pen mini and 17mm dangling off my 60” strap did the job.

The first two days were late summer wet, hot and humid. It tested us coming from a stubbornly cool spring at home (overnight temps on Kyoto often exceeding our highest daytime temp to this point), but thankfully the first two days also often bring with them a level of fresh eyed enthusiasm that helped us push through.

Our friends were seeing Japan for the first time with as the Japanese would say “child’s eyes”, so apart from some blisters, dampness and sore feet, time passed happily.

My footware choices were a stand out. Merrill Longsky 2 trail runners, mostly made of some type of hardened plastic mesh negotiated the wet days faultlessly and provided amazing (Vibram) grip on any surface. I switched to a pair of Fly Strike runners and MOAB 3’s for the other days and even with new shoes all around (some clearance specials, so not a huge spend-about the value as the MOAB’s at full price), had no blisters, pressure points or sore feet the whole trip and we usually walked ten plus KM’s a day.

From then, mild heat, very light rain and more often than not, perfect travel conditions.

We showed our friends our “top ten” Kyoto destinations, so sometimes touristy, sometimes not, but our must see’s for new travellers to Kyoto and Nara, including a walk over a small mountain and they also sent themselves off to Hiroshima for the day. We missed a few spots, but there is always the chance of another trip.

*My intent is to do 2:1 triptych or paired sets, sometimes 1:2 hanging ones as well. All the shots were taken with this compositional aide applied, but are of course RAW files, so I have options later.

Japan Kit, New Thinking

This trip to Japan will have a few differences to the usual.

I am going to use a Panasonic for the first time (G9 Mk1), with a Pen Mini as my casual street cam.

The G9 will be shot with the preview screen set to 16:9 ratio (or maybe even wider like 1.85 or 2:1), using the truly excellent preview feature (allows frame line colour and also darkening out off frame opacity selection set at different strengths). This is because I want to see the place “cinematically”.

Why?

For a change and to introduce a desired limitation. I feel that seeing as right now I am seeing things with a cinematographers eye, maybe I will slow down and compose on a deeper level, if I force that view.

I intend to shoot for maximum drama, maximum story telling intrigue and impact.

Of course the RAW files will be left intact, so it is simply an illusion of creative convenience, but one I will be using on capture, import and export.

The G9’s are probably my most liked cameras overall, but are not without their limitations, often relegating them to second camera/hybrid roles in my work kit.

I would not use one for sport if I have another (Olympus) option, especially without Pana glass, but they work well with wide angle lenses, human detect and the colour makes less than perfect light brighten and “pop”.

They are also great for video and they are feature packed if a bit menu fiddly.

Oly colours on a rare dry day on one of our early spring trips. The light this whole trip was hard, brassy and often dull thanks to cloud cover, Spring glare and city heaviness. What makes this one stand out is a lack of umbrellas.

In a lot of ways they are like EM1x’s-lite, but true hybrid cams.

Panasonic colours, tempered by mostly Olympus glass, a combination I really like**, will suit the early Autumn colours and it looks like humid and moody weather, so the weather sealing will be comforting*.

The little Pen at a pinch could be my only camera, so it is a decent backup, while it also serves as a good street cam worn cross body on a long strap (60” Gordy). Street shooting is not on my radar really any more, but street-adjacent urban landscapes are and people are a part of that, so the funny little red Mini will do it’s job discreetly, always at the ready, a known winner of a combination.

Nobody pays this camera any real attention.

Oly colours really sing in strong light, like the late afternoon city light seen here. The Pen Mini has proven itself in this light over and over.

Lenses will be the 12-60 Pana kit as my work horse in good light which is close to as sharp as the Leica version, weather sealed and light and the 9mm Pana/Leica. The rest are Olympus, the plastic fantastic 40-150 kit (a surprise packet), which weighs absolutely nothing, the tiny 17 and 45 primes, my absolute must take lenses for low light and Japan generally (the 17mm has taken probably half my favourite shots over the years).

So, 18-300mm (full frame equivalent), some fast, all versatile, the five in total weighing about the same as the G9 body alone.

All carried over in my love/hate Lower ProTactic 350 backpack (old model) and when there a little Crumpler shoulder bag (cannot remember the model, like a 5 million dollar home, but softer), which holds 1-2 cams and 2-3 lenses (the Mini and 17mm would likely be worn anyway). The PT350 is uncomfortable, always conspires to be too small and generally agravates, but it is semi-hard, so good to trust with gear in overheads, or just to put my feet on.

*Someone was horrified the other day when I spilt the remains of a coffee on my oldest G9 and 8-18 lens. Even more so when I used fresh water to wash it off and continued on un-phased.

**Mixing the brands makes a lot of sense. The organic and realistic Oly colours are lightened off with Pana lenses, while the sometimes overly light and bright looking Panas are bought slightly down to earth with Oly glass. Favourite combos are the EM1’s with the 15, the G9’s with the 75mm and 12-40 and the 12-60 Leica on the Pen F.

100 Chances To Stuff Up And Still A Surprise (Or Trust Your Eyes, Not The Tech)

I did a huge job the other day, the sort of job that requires your “A’” game for an extended period (5 hours), no slip-ups, no excuses.

100 school groups, from teams to student year and social groups, one every five minutes for two periods of about 2+ hours each, a cast of 10 or so staff, and potentially 1700 students.

I did everything I could to nail the process short of double shooting it (2 cameras).

S5 Mk2 at ISO 800 for clean ISO performance with a 50mm for distortion control at f4-5.6 (depending on group depth). M43 was the obvious option, but the space is notoriously dark, so I went with the ISO performance of the full frame.

Markings on the floor for consistent central seat placement and shooting alignment (at three locations for different sized groups).

New camera with 2 formatted cards, tons of batteries, a 5” screen on top, manual everything, tripod on wheels.

Two things still went a little wrong, one important, one just annoying.

For some reason known only to my inner ear I suspect, I shot the whole day with the tripod head tilted slightly down, so I spent way too much time later re-aligning every one of the shots to be perfectly straight. I deliberately used a simple two-way Manfrotto monopod head to reduce movements, but the only one it had, bit me.

I could not do a batch straighten when I sorted white balance etc, because I was not perfectly consistent with my setup. Next time 2 bits of tape will be used, not one to get the front wheel of the tripod lined up exactly straight with the camera.

Annoying, but only I know about all the time wasted in post.

The second one really pisses me off, is that I trusted in camera peaking in manual focus and it failed me.

Controlled space, plenty of depth of field and a wall of red peaking colour all over the subject, only taken from the camera screen for guaranteed accuracy. I did not have peaking set on the 5”, as I was only using it to compose and check faces etc, which is why after a half dozen shots, I realised, they were all just a little out of focus.

Not terminally, but noticeable in processing and eventually on the bigger screen.

That feeling, when looking at a small size preview that there is a lack of delicacy, confirmed on closer inspection.

It seems the vagueness of peaking in that specific circumstance was enough to give me too large a range of acceptance with too small a range of accuracy. It even covered people walking in front organising seating, but was actually falling slightly behind the group!

F&$k me, what is this S&@t any good for if it cannot be trusted to do the one job it is assigned?

I compounded the issue by applying ON1 Tack Sharp on auto (which sets full strength de-blur) hoping the printed size would hold up, but unfortunately when the printing proofs came back with their own applied output sharpening, it was not nice. Clown makeup might be the closest way to describe it, Groucho Marx style.

Peaking is a good tool, but it’s big down side is, depending on the target, is it may get so busy it can actually distract and mislead you and you cannot tell. I could actually see perfectly well to focus with the 5” screen alone, even without magnification, a much more accurate tool, but the wall of peaking colour actual obscured the targets.

If I had not used the bigger screen I may have checked the results, but maybe not, so not sure whether the bigger screen saved me or damned me.

I switched to face/body detect AF and no misses for the rest of the day (94 groups x4 images in 3 locations).

Lesson learned and I guess disaster avoided…..mostly.

Be there soon (Japan), a much nicer thought than a narrowly averted catastrophe.


Pulling Some Stumps.

I have started a lot of posts lately and they have all stalled.

I am tired at the moment, handling the third school term hump, new clients in their finals seasons and just sick of the tail end of winter.

They were all going to be something they are not worthy of, so I am going to quickly pull out the stumps of these dead trees.

Gimbals.

These just need to F&$k off from my thinking. Nothing personal, nothing irrational, just the idea of them needs to go away so I can focus on all the ideas I have that are as good or better.

White balance.

I am realising this is the simplest path to better quality and faster processing, probably the single most important adjustment for quality and consistency. RAW is fine, but nailing down some things are time savers, because the preview you are given can be misleading.

Unfortunately just setting it manually does not work, because Lightroom and Capture 1 will re-adjust the previews slightly, but a pre-set for batch processing a ton of time. Trying to get it right in camera does stabilise your eye for later post processing as well as helping with guesti-mating WB for video better.

About 4000k with a touch of added magenta.

Gear (this one kills off two redundant posts).

A long winded post on the virtues of all gear from any era and the false claims made by manufacturers about the need to adopt the next best thing or be damned to the pile of photographic second-ratedness is avoided.

Our maker fuelled obsession with more resolution and bigger numbers is becoming less and less relevant as the numbers are plenty big enough folks! This has always been the case and always will be, but right now, there is less and less reason to buy the newest and greatest, because basically it is all great.

Coming from a mirrorless user of over 10 years, right now I feel the very best bargains are to be found in all the recently discarded DSLR’s available. Seriously good cameras for peanuts folks.

Japan kit (again!).

I was torn between my perfect “Zen” kit of the Pen F, 9, 17, 45 and 75mm (or just 17 and 45)* and my “low stress” kit of a pair of worn EM10 mk2’s, the street expert Pen mini with the 9, 17, 45 and 12-60 and 40-150 kit zooms.

The Zen kit puts me into a limited, maybe precarious (1 camera with 1 card), but highly focussed and clean space.

The other kit adds depth, options, with low preciousness but also clutter, both mental and physical. Both suffer from worrying issues with old and under used batteries for the Pen F (I need all 6 to feel safe!), the other shows signs of reliability issues from age and heavy use of these non-pro cams.

I have decided after all that to go with a G9 mk1, the second set of lenses from above (or maybe the first) and a single EM10.2 as backup. I have never shot Japan with Panasonic, so it is maybe time for a change and the Pana colours in early Autumn may be a winner, especially if the forecast rain comes.

The capable G9’s are still not as natural to me, so sole reliance on one I hope will change that. A small bonus is more pixels and weather sealing, as the weather looks patchy.

I have a basically unused one that takes 2 cards, produces great video, has good battery life, EM1x like handling, stabe and low light performance.

Working with the theme of three contrasting points, this image, with a little patience may have delivered. The muted and gentle colours of the old EM5's look to my eye close to the G9's.

All clear now, stumps pulled, field clear, time to move on.

*Shot for 16:9 cine-wide format, then processed as pairs or in triptych, just for fun (in RAW so not really, but with frame lines for composition and import).


Focussing On Focussing On Focus

A bit convoluted, but it is one of those nagging things that comes to me loud or softly on a semi regular basis. While looking at an older article I wrote a few months back I was taken by the things I said about an image “Lella, Bretagne 1947”, which I meant, but realise now, I seldom actually do.

An image is a sum of its parts. The central subject or subjects, the frame shape and scale, the out of focus elements, tones, colours, focus points and transitions. What worries me is the modern habit I have developed of tending to think in flatter forms, less aware of the whole of an image. Shifting to auto focus will tend to do this, because the relentless need to hit accurate focus means you tend to get tunnel vision.

When shooting landscapes or macro slowly and methodically on a tripod, it is natural for me to go manual focus and I realise now, my photographic mind set changes.

Street photography using zone focus also allows this partially, but shooting from the hip is more luck than perfect control.

My comment on this image was the quality of the subject behind the obvious one. Such a powerful main subject, an equally strong support.

The title above is as close to my thought processes as I could manage.

I am going to focus on the ongoing need to focus on being more wholistic, more imaginative and even a little old fashioned with my focus, my actual practical lens focus that is.

I am aware, sharply, almost painfully aware, that I have lost a whole way of seeing images. I have become linear in my image making, instead of layered.

I once chased that elusive depth n my inages, which only seems to come now when I shoot street images and that is in part down to very process of zone focus and being “in the flow”.

Truly great images come in many forms.

To me, one of the most powerful is the multi layered image, something many of the recent masters of documentary and street imaging were expert at, but in the auto focus age, the recent upsurge in “perfect” lens design that strips the character out of glass, maybe even lenses that allow ridiculously wide aperture photography with that all too soft rendering, we have lost the ability to see in multiple layers, to see smoothness and gentleness, transitions and a hierarchy of subject relevance.

Old tech forced a way of seeing and shooting, something we often cursed. If this was simply a lucky coincidence, an organic process long evolved, then the warning signs of AF and digital changes were all obvious, but also too quickly upon us and with them came all the benefits of speed and accuracy.

Speed and accuracy. Are these the enemies of empathy and connection.

I feel there may even be an argument for the “film look” partly being the different process used to capture the image in the limited frames, manual focus, less than perfect lens period. More depth came from good technique. More depth added…… more depth as it goes.

To see how we used to may mean partially winding back the technical clock.

Technology is always affecting photography, it is a technical discipline, but ways of seeing images are capable of transcending that.

It seems though, that maybe I am not anymore.

I used to see a frame using the “middle distance” style of martial arts, which is where you look at a point between you and your antagonist, feeling their movements as shapes in context to the whole space, not zeroing in on any specific move or object. To see the whole at once as a moving stage that you are part of.

I am very aware I am fixated now on focus point placement which in turn steals my attention away from the greater scene in front of me.

Like a nervous debutante actor, I am fixated on my blocking, but not the stage as a whole.

Manual focus and the right lens are part of the recovery programme, should I choose to take it.

The lens, something that needs some consideration needs to be a special combination of gentle primary rendering, with long transition out of focus rendering and strong micro contrast. The Olympus 17mm f1.8 has this, the 45mm maybe also. The old Pen F lens, the 25 f2.8 may also have these qualities. Other lenses that come to mind are the 12-40 f2.8 and maybe my cinema glass.

Wide open, the 45mm shows some promise, but wide open also misses the point. I often use this lens with multiple layers in mind, where the 30mm Sigma and 75mm Olympus tend to be main subject only lenses.

Many modern lenses do not do this. They are too sure of themselves by far, using optical perfection as an excuse to avoid character. I have always been aware that some lenses male you shoot certain ways.

I have lenses I rely on to give me startlingly sharp primary subjects only, others that make me think deeper and wider. The Canon 28 f1.8 did this, the 35 f2 (old model) also. The 17mm has the same effect, the 15mm Leica does not.

A link that may be useful is my video lens preferences. I feel that some lenses are better for video work with manual focus than others. Maybe this is also a hint that they are better suited to forgiving manual focus “by feel”, than more modern in-out lenses.

Same people reversed, so on this day, I obviously felt this was a thing and I have noticed often, that some lenses make me think this way, others do not.

Rejecting backgrounds seems to have become a sign of professionalism in photography. Layering depth in an image, seems to be off-trend.

This image was taken with the 15mm Pana-Leica, a lens that screens "sharp cut-out, soft background". A modern trend, maybe in response to pin-point accuracy and AF, hero-ing the subject, rejecting the background. I know from experience, that my Oly 17mm would not only render this differently, but it would also make me think differently while composing the image.

The 17mm allows me to see with depth. The two lens are similar in a lot of ways, but background rendering is not one of them. The 17mm often gets low mass for Bokeh, but I feel that it is miss-understood. Its rendering is not up to modern in-out super soft Bokeh standards, being better suited to "old fashioned" long draw, background inclusive rendering.

Even at wider apertures, it is capable of telling a story. I have tried to prove this out and failed, but in use it is there. I feel confident in shooting quickly and letting the lens sort it out, the 15mm above is much more about getting it right, the alternative being an obvious wrong. Neither is the right or only away, both have their uses.

This is a trend and as such it will evolve over time. Some of us though wish to be trend immune and let an image get what it needs.

So, tools for the job.

The Pen F and 17mm are probably ground zero, using manual focus, considered and immersive composing using depth and form over focus prioritising perfection.

Longer lenses are tough, being more subject orientated by definition, but the 45, maybe the 25 “F” series lens from the old Pen half frames, the 25 Oly maybe and I think some zooms may need consideration.

The main thing is though, maybe for the next rip to Japan, I am focussing on focussing on focus as a priority, but not in the obsessive way I have been.

Photography Traps, That Still Catch People

I have been around cameras and photography long enough to have seen some repeating patterns.

The patterns tend to be related to the selling of new gear, the perpetuation f the myth that you, the photographer, cannot take images as good as the new camera release with your old camera.

The speed of this repetition changes a lot at different times, sometimes it is super fast, almost a twice yearly even (Sony a few years ago released more cameras than lenses for a couple of years), sometimes it seems a long time between waves, but it is always moving.

The reality is, if you can take a decent image with a brand new super camera, then you can take one with a camera from most eras.

In my photographic life, I have usually been behind in the tech stakes. Very rarely have I had the very best around and if I had, it was usually just before it was replaced. Owning this stuff did not make me better, but it often made me aware of gear cost to productivity pressures and my stress levels regarding the quality of that gear rose. Drop $3k+ on a lens and you tend to look for problems, while a kit lens, basically free with a camera purchase often surprises.

Periods of making it work while under equipped are plentiful. I remember working for my first school with only EM5 Mk1 cameras. Great cams for my personal passions, travel, street and a little landscape, but not professional by the top DSLR standards of the day (D750 Nikon and 5D3 Canon). I managed.

My sport shooting went back to old tricks from the manual focus era, with a little AF when able (which was surprisingly often I found). I had no right to represent mysef as a professional in that space at that time, but I did and it went well enough.

When I started with my second school, I had the benefit of an Em1 mk2, a camera still serving me today, over a million frames later, but still had amateurish glass. I remeber sweating bricks shooting football in the late winter afternoon as my ISO settings hit 3200 and my aperture wide open at f5.6.

When my mother passed a few years ago, she left me a small inheritance, some of which I spend on gear, not through indulgence, but more desperation.

I bought an EM1x, 300mm Pro and 8-18 and I bught back my recently sold 40-150 f2.8, all things that I felt I needed, even if I did not personally want them. They have saved me time and time again.

Taken by a friend with a reluctantly bought small sensor compact camera after a travel mishap. Could it have been used to sell the latest and greatest mirrorless (or holidays to Scandinavia)?

The EM1x also opened up another door for me, requiring Capture 1 to open the RAW files on my aging Mac. C1 effectively updated my gear a generation, especially in the sharpening-noise ballet Lightroom was known for.

A few years later, I went to the paper and my issued kit, much the same as the other photographers, was made up of well used, but contemporary Nikon DSLR’s and lenses. D750’s, D500’s, the f2.8 holy trinity and a monster 400 f2.8 af-s should have blown my mind, but I found the smaller, nimbler gear I had, with the use of C1 processing actually gave me the same results, I worked faster and never complained about gear left behind.

Getting back to the point.

The Sony wagon was going full tilt, Nikon was releasing the seminal Z9 (later issued to the paper and I used one a few times), Canon was getting their act together, Fuji also and even Olympus and Panasonic had released new gear.

Did I need a new camera as the ads said I obviously did?

No it turns out, I did not. I have actually since bought two more EM1x’s second hand and two new but dated G9 Mk1’s, the newer G9II is for video. Technically I am now three generations behind in Olympus camera, but still find uses for EM5 Mk1’s, EM10 Mk2’s, Pen F etc.

Smaller sensors in older cameras are plenty.

I am happy that base image quality is not a relevant concern.

The traps used to snare photographers money are many, some more real than others.

Image quality;

IQ is not down to pixels, dynamic range, colour depth, new model numbers nor indicated in any way realistically by a flash image in an add. That trick has been used since day one.

I remember years ago a major name brand being caught out using a film camera image to advertise their new digital masterwork. They only got caught because they had used the same image for the actual taking camera years before and in the days of magazines, we kept all our old ones.

What "quality" does this image have and does it have anything to do with technical quality. Well flogged EM1 Mk2, equally abused 40-150 f2.8, cheap SD card. Not "cutting edge" or even the best I have. Sometimes I get sick of perfect sharpness and clarity, but if you have it in abundance, you can always reduce it.

IQ comes down to taking a good photo of an interesting subject, technically well enough for the process to be invisible to the viewer and reproduced to the needs of the viewing media. Old film cameras could do this and still can. I have had cropped images printed on billboards and nobody complained.

The incremental advances in photography are so microscopically slight in most cases, even the best trained eye cannot see them. When the 36mp D800 came out replacing the aging 12mp D750, a seriously big jump in specs, people adopted them automatically. Nikon people had denied pixel envy, but as soon as a decent option was offered they jumped in both feet.

Many that I spoke to (customers of many years), found that only on close inspection or after massive crops could they actually see a difference and they often dropped the size down to save space, because nobody but they cared how many pixels were used. One user even used theirs in crop mode for sport, switching do a D500 later.

The really big change came with super sharp mirrorless sensors with reduced or removed AA filters, often at relatively low pixel counts. I was stunned my the clarity of the EM5 Mk1 images I made with tiny little lenses compared to my 5D2 and 5D3 “oily smooth” images. Sure the Canon’s had that characteristic colour, but the clarity and realism of the Olympus files were a revelation. It mattered little in reality and in hind sight, it was should have been other factors that made me switch, but I learned then that IQ and pixel count, sensor size and dollar value had little in common.

Video.

Video is a growing concern, but that is also slowing and with similar apathy by users towards resolution. Many aspouse the virtues of 4k, then happily output at 1080p. Like still photography actual practical needs and theoretical potential have little in common.

This image perfectly usable for most uses, is a lift from a 1080 video clip.

“Achieve the best in image quality and fidelity with camera X (or be damned?)” is an illusion as is an add for a car speeding across the desert floor at impossible speed, a pill that makes you fly through your day (legally) or a beer that makes everyone like you.

All that matters is content bought to life with skill and empathy.

In Light Of.....

After my last post, I got to thinking again about lighting.

I have plenty of light, but it is a bit of a mess to apply.

I can punch 300w+ through a mod, but it takes 3-4 lights to do it and they need power.

I can be portable and wall power free, the kit is;

  • Amaran 60d

  • Weeylite RB9

  • A couple of little tubes and panels

  • A pair of Manfrotto Nano stands and some Neewer super lite ones.

This all fits in a small 40L suit case with a Smallrig soft box and other bits.

Neat.

A little limited.

The Amaran is the 60d (for daylight), the RB9 is RGB, but not as powerful and only two real lights does limit my options. The Amaran can run off NP batts, which I have plenty of, but they are also doing other things, the RB9 has good life and decent power and it can be powered off a power bank (which it also is).

So, what if I wanted to add some decent power to the kit, not add much in the way of extra stuff and do not want to spend a ton on another light?

The Smallrig RC 60b (bi-colour), has an internal battery, is bi-colour, can run off a PB, is cheap compared to others ($210au for the lite-no frills kit) and tiny. It is about the same size as the bare Amaran, but needs nothing but itself.

It is not perfect, needing proprietary mods and there only two, a small diffuser in the box and a small and over priced soft box. It has no app, something I rarely bother with, but if stuck above the shoot on a tall stand or boom, it would be a major pain to adjust on the fly.

These concerns are probably not a big deal really, as the Amaran does everything it does not and there are ways. Because it does not ironically fit the Smallrig lantern or softbox I have, it would probably not be the overhead light anyway.

The mod thing is something I would have dealt with easily anyway, running it into a or through a brolly, reflector, diffuser or a combination. Small soft boxes are not appealing for good light quality, so I would have never likely used it.

Light colour being limited on the Amaran to daylight is something I was ok with from the get-go and it got me a cheaper, brighter light than the 60x. It meant I can shoot the whole scene with adjusted white balance based on the slightly stronger main light, then re-adjust background light with the RB9 etc.

The Smallrig light though would allow me to either replace the daylight light with a bi-colour from the start, handy if the background is massive like the outdoors, the Amaran can then be gelled to warm or cool as needed as a second source or just to mimic daylight.

Lastly, but not a small thing, if I need more punch, say 120w of punch, I have it with the two combined without having to run power to larger COB lights.

With several NP970 batts, and several power banks, it would not be unreasonable to expect 2-4 hours out of these lights.

Ordered.


Video, What Would I Prioritise?

Starting out in video is a big move. A little smart phone success may lead to a desire to “go cinematic”, leading to many paths of growth, some needed, some not.

What would I recommend, as a budding video maker?

1

Plan

Be aware of what you want to achieve, what story you want to tell..

Work out what you are trying to make and watch the right videos or talk to the right people to learn how to. If you like low light, moody films, then think low light capable and minimalist lighting. If you like commercial grade interview style, then watch these video’s and learn how to make them.

D4Darius or Epic Light Media are perfect examples of vlogs that can set you straight early on. Want to make a low budget short film, then look at how to make those, not multi million dollar Hollywood epics. D4Darius has won awards using very basic kit and ELM even has a video on making a commercial with gear bought from home depot and a phone.

Good advice is always good to get, but the right advice at the right time is even better.

I learned this the hard way. Lots of bad choices, dozens of examples of Rodger Deakin, Wes Anderson etc doing their magic with massive budgets and a crew of dozens, not enough Mark Bone, Luc Forsyth and D4Darius early on to keep me grounded.

2.

Software

Decide on your workflow and stick to it.

I went with DaVinci Resolve from the start and the learning curve was and still is steep, but I am not being held back by something light weight, forcing me to learn-unlearn a new system as I grow. Premier Pro, Resolve, Final Cut, it matters little, but stick to one until it is no longer the thing that holds you back.

I chose DaVinci because it has two main benefits and one consideration. It is free to get enough to go on with and is becoming an industry standard, but it is also deep and complicated (the last one is a sword with two edges). Pick what works for you as long as it is not a dead end in the short or long term.

3

Understand technical realities

Get your minimum and maximum quality level set, understand how that is achieved and go straight to it. No point in taking pointless steps toward an end point if they fall short.

Understanding some tech stuff is required here, but it boils down to picture profile or codec (LOG or not), colour bit depth, frame rate options (for slo-mo) and resolution. Lots to know, some a little perplexing with plenty of opinions and contradictions. Comparing camera specs can help or equally confuse, so my advice is to look to vloggers like Caleb Hoover, Markuspix, Mark Bone, D4Darius or RICH Photography, then follow the associated links from there.

The thread is basically this; most use a LOG format, some don’t or don’t always and RAW format is seldom recommended for standard video work. These voices will help sort out the mess.

This is often where money is wasted for little benefit if you buy a camera and lenses before you get this right. Everything at the moment seems to be measured in 4k/60 terms and 6k is looming.

Good quality is possible with;

  • Quality 1080p or down sampled 4k.

  • 422/10bit colour depth.

  • A Flat colour profile for decent dynamic range and flexibility in post.

Format does not dictate this and 4k resolution is handy but not required for broadcast level quality. The rest comes down to the rest, lighting, technique and practice. I have fund with video, doing practice runs and pretend scenarios is not the same as actually making something real.

The above is plenty for almost any uses. Less can even be used successfully, but is not necessary to compromise these days and lower quality should be a choice, not a forced restriction. The reality is, like with stills, you are after the end product, the “jpeg” equivalent, which may well be achievable out of camera and not need a ridiculous dynamic or colour range, but you need options if it is not easy to get.

LOG profiles, even RAW format are pushed hard for their extra DR, but walk your own path. Start at the beginning (a Standard picture profile) and see how close that gets you. There is a lot of good work being produced without resorting to LOG profiles which have their own needs.

Torture tests for dynamic range aside, people will accept inky black shadows as “creative licence” and lighting can fix these, but badly blown-out highlight elements if they are important, are like bad sound, un-ignorable. You can avoid what you cannot control.

Good quality can be upscaled, poor quality is still poor even if it is 12k. If you are happy with 4k/60 LOG as your top end, then there are a lot of cheap options, but make sure the other elements like colour depth are there also. Even Game of Thrones was filmed in 1080, then upscaled for 4k DVD sales. A bit like engines, it is not the size, but the application that matters.

I use 10bit/422/1080p at 50fps (Pal region), in Flat profile on my Lumix cameras (M43, APS-c and full frame). Flat profile also allows me to apply idynamic DR expansion. This is easy to grade, plenty if I am careful not to shoot everything with a bright window in the background and consistent. RAW is better theoretically, even full LOG, but for my needs (see point 1), this is enough. Remember that incoming quality is only trying to give you what you want to see at the outward end, so sometimes a Standard picture mode right out of camera may actually be enough, I found this out with my G9 Mk1’s.

4

Camera choice

Buy a good enough camera to meet the above criteria, with a little up your sleeve if you can.

Overbuy and things get harder, not easier. Concentrate on what is important to you. If you intend to use a gimbal or tripod, then internal stabilising is possibly irrelevant, if you intent to go “old school” and manual focus, then AF performance is equally irrelevant, meaning you can pick up a lot of very decent recent cams cast aside for more sure footed AF performers.

Not much point in worrying about AF performance if you intend to go this way.

Look at formats large and small, all brands (be careful of bias) and be sure to check out “best buys” for recent classics still relevant in the current world. The things that really matter are your own reactions to handling, colour, legacy of the brand and their full ecosystem. Gotta like your camera.

Light levels you want to work in may also effect both camera and lens choice, the two being linked. A smaller sensor with a faster lens and depth of field considerations can equalise the playing field.

Some cameras come with the “compromise” of a Super-35 crop in some settings, but all you need to do is take that into account when buying lenses (i.e. buy a zoom with decent wide angle or even a good prime that then has effectively two focal lengths).

If you may need more than one camera, this is something to consider now. No point in putting all your money into one expensive camera if you have to do the same simply for a second angle. A Panasonic S5 can cheaply be two or three in support of an S5IIx, a Sony FX3 can be matched to an A7 or A6000 series and the new GH7 can even matches an Arri.

Brands tend to share colour science across their offerings, but mixing brands can also work, you just need to research and have the skills to adjust them.

Falling loosely under this umbrella are drones. No real opinion here. If you have one, it will undoubtably become a useful tool, but the lack of one will do no harm either.

I went M43 for stills and I am happy there. For video, the smart move for me would have been to stay there, but I messed that all up with some full frame because my timing sucks. Nothing wrong with a mixed kit and as it turned out, my G9II and S5II are almost twins with their own strengths, it is just messier than it needs to be. In a multi cam set-up, cross-compatibility really only matters for colour and codec matching, which I can and various formats have their uses.

There is a little too much hate aimed at non-full frame cams at the moment, but keep in mind that 98% of movies shot up until about 5 years ago were shot in Super-35 mode (film and digital), which is closer to APS-c/M43 in size and many of the top digital cameras still use the format.

5

Lenses

Lenses are the best place to take a breath and ponder your real needs.

If your answer to the AF or MF question in point 4 was “AF please”, at least as an option, then you will be buying a modern AF lens. Old lenses can be good for effects, but be careful not to accept any flaw as cool, because some just aren’t and all are limiting.

A good 24-70 f2.8 zoom or equivalent for your camera format is plenty to start with, especially if you embrace APS-c cropping giving you 24-105 overall range (and you can shoot 4k to crop 1080 for even more versatility).

Cine lenses add benefits for rigged setups, especially manual focus based rigs, but are often more expensive than the very same lens in stills guise (IRIX, Sony, Sigma etc), or conversely, some cheaper cine lenses are actually better value than low end stills lenses (TTArtisan, 7Artisan, Viltrox, Sirui), thanks in part to their simplicity. .

Cine lenses are also meant to be mechanically similar, which the budget ones do well and match each other in colour and rendering, but the budget ones often fail here.

A lot of top end productions use “character” filled wide field of view anamorphic glass (Shogun, anything Wes Anderson), but these lenses cost and can be limiting (once captured, you cannot reverse the look). Anamorphic effects can be copied to some extent, so maybe instead use streak filters, retro glass or letterboxing with regular lenses? In some scenes of Shogun and even some recent Marvel series, people on the edge of frame are actually lost to lens flaws, so be careful what you wish for.

Rodger Deakin prefers to shoot “straight” then add effects after and pst processing or filters can add effects as needed.

After exhaustive testing, my take-aways are most lenses are sharp especially at more useful apertures like 2-3 stops in from wide open, especially in the centre where people look, but most have very different colour, blur rendering and flare control and some just suck in the handling department.

A massive hypocrite here or an example of the pitfalls of being lens obsessed. I have a little of everything from state of the art stills lenses, to retro refugees, entry level and better cine glass over three formats. I justify my bloated lens selection by mating them to the right cameras (S5 mk1 gets MF cine lenses, the better focussing S5II gets hybrid Lumix-S AF lenses) and can also I shoot stills. If pushed, I would recommend a good 24-70 f2.8 Sigma for full frame, the Sigma 18-35 f1.8 in APS-c or 10-25 f1.7 in M43 as a good start. For me personally, a 35mm on full frame, cropped to 50mm in APS-c is plenty, but I use zooms on M43 for versatility while moving.

6

Sound

This should be higher up the list, probably in point 3, but camera choice, shooting style etc may effect your direction.

The old adage “sound is 50% of video” is kind of right. Poor sound means basically no video, simple as that. Exceptional sound on the other hand can make even poor footage look like you meant it. The kicker is, really good sound can be had for about the same a mid range lens, so you have no excuse.

Run a decent shotgun (MKE-600 or similar) or decent LAV’s (DJI/Hollyland/Rode etc) into a similarly decent field recorder (Zoom F6, H6 or similar) and you are golden. Any mic, when close enough to the subject, can record more than acceptable sound. Better gear just means more range, reliability, cleaner starting sound. Research may drive you slightly mad, but remember, everyone’s voice is different, and there are many more controls and variables available, so take advice as meant, but not too much to heart.

Some useful bits to start with.

Effects and music are available from many sources, shop around here, you cannot really go wrong or for more fun, record your own.

My main kit, a mess like much of the rest is multi layered or I should say, lacking direction, but not options. I have taken my own advice and can run a few shotgun options into a variety of Zoom recorders (always good to have backups right?), there is also a full set of music mics, some LAV’s, direct to camera or computer choices and a ton of “bits” kicking around in case. My main mic for videography is not my MKE-600, but my SSH-6 on my F1 Zoom, because for general use I have found it more flexible or alternatively the MKE-400 which is far more useable. The MKE-600 is technically a better mic for booming etc, but like most shotgun mics, it is limited in other areas. I have a Zoom H8, H5, H1n and F1 with several capsules, all different, all useful in their own way.

7

Stability

Get……a……tripod.

Get a good tripod, not one of those “handy”, overcomplicated, undersized travel things. A simple, reasonably solid, fluid head (not ball) is where you will end up if you stick with this, so go there sooner rather than later. An exception might be if you are a travel vlogger who may use a gimbal most often, but for everyone else, get a tripod first.

Weight equals stability, recent in-built stabilisers are amazing and specialist gimbal-cams like the OSMO Pocket are also an option, but think on the style you are chasing, your actual needs compared to possible capabilities and applications. I see a lot of “like new” gimbals on ebay and that is for a reason. They need skill to use, tend to be a required, sometimes dominant kit consideration and do not fix everything.

I am not a gimbal guy, using the G9II and S5II’s with their excellent in-body stabe with a variety of old school tools to help with movement and hand held work, otherwise a mechanical slider and decent tripod (Manfrotto 190 with Neewer fluid head) are all I need..

This is me, able to do moving shots steadier than many top flight cinematographers use when shooting “steadycam” mode, but not as “perfect” as gimbal footage.

8

Filtering

In video, this is in partly unavoidable, but also partly optional. The unavoidable bit is a Neutral Density filter of some type, because the 180 degree rule requires fixed shutter speeds, fairly slow ones and that means your exposure triangle tends to be limited. The most popular types are the monstrously expensive variable ND’s bought in the biggest filter size you may need and cheap stepping rings used to fit other lenses.

An 82mm VND from a major brand may cost as much as a decent prime lens. You can use fixed value filters and some cameras have built in ND’s, but if you have those, you are probably not reading this.

Other filters are purely for creative effect, but some seem almost mandatory at the moment. Mist/Black Mist/Cine-bloom filters offer a deliberate softening and highlight blooming effect that seems to be very in at the moment (huh…Moment is a filter brand also). The irony of people spending multi thousands of dollars on top tier cameras and lenses and then softening them down to look like older film cameras is not lost on the industry, but it is not reducing their use either.

Other filters, like light streak, star or colour change filters are also used sparingly, but may be of more actual use.

the reality is, you may not need many or even any filters, but it is funny how quickly you can accumulate them without a plan.

My kit is a mess, because several times I drew a line under my biggest filter size then shifted it (62, then 67, then 82), but it is useable and I can use multiples of the same filter at once, which comes in handy. I use fixed ND’s (Hoya Pro 8/32/100 strength which is 3/5/7 stops) in preference to variable (which I also have) because they allow me to mount the lens hood back on (unwanted flare being……. unwanted) and I can calculate my exposure rather than the seamless VND roll, or for my very large cine lenses, I realised too late that a matt box and slide in filters were actually cheaper in big sizes.

I also use polarisers, weak 1/8 strength mist filters, differing brands giving me slightly different strengths and looks and blue and gold streak filters for a faux anamorphic look.

9

Lighting

This is last, because it is the most important thing!

Ok, what I mean is, light is everything, but it is also free to start with. Use natural light as long as you can, work angles, experiment and remember that all lighting in movies etc is trying to mimic natural light!

Then move to cheap, even free modifiers like reflective surfaces, diffusion cloth (shower curtains), “motivated” or available light, then add what you cannot find. Work into this. Visit the local hardware store or haberdasher to get ideas, buy single decent lights, then good supports until you feel bullet-proof for your style. The camera and lenses you choose may determine what and how much you need and your style surely will, so don’t rush this. Do it right, do it once.

My lighting is a you guessed it, a mess. I went cheap in quantity with the sound logic that I would have depth and versatility, until I pack it all that is. Several 60w COB lights and mid range LED panels can give me lots of options in small cases, but I have to set up a wall of lights if I want that 300w blast through a window. My interview kit is simple, an AMARAN 60d and a RB9 Weelite, but that is a one trick pony. I am lucky my stills kit has a lot of mods, so some money was saved there.

10

Rigs

What can I really here that I have not said, contradicted and said again?

Rig as you grow, change as you need, don’t do it just because it looks cool, don’t avoid it because it looks complicated. each of my three dedicated video cameras has their own application, their role to play, so they get their own rigging options.

Probably the most useful tip I can offer is try to go universal for tripod plates. I use cheap Neewer plate adapters for all my heads to make sense of my mix of Manfrotto, Arca Swiss, Neewer and non quick release heads. One button pushed and I can switch from ball head on a rail, to fluid head on a tripod, to gimbal, hand held rig or nothing.

My G9II gets a hand held monster rig (see above), the S5 is setup for extended recording on a tripod with cine lenses, the S5II one is left as is, with only a top handle to fill what ever role is needed.

11.

Well there is no eleven, just use it and make stuff.

To sum up;

  • Get an idea of what you want to do (assuming you have a story to tell).

  • Learn a programme enough to get started, it will come as you use it, but simple cutting and shaping is a start. DaVinci has a whole free learning module with included footage.

  • Set your expectations to reach your intended idea and your editing “chops”, which may require learning the “jargon” of video formats etc.

  • Buy a camera and lenses to reach the intended quality with a little to spare if you can.

  • Buy some filters if you need based on camera and lens selection.

  • Get your sound sorted as a priority, not an after thought.

  • Get your stability sorted and work out your “moves”.

  • Decide on lighting and how you want to control it, then control it. Less is more until it isn’t.

  • Make videos, learn, repeat.

If it were me starting now again with what I know, the G9II, G9I, 10-25 f1.7 Lumix, 45 Olympus, a Zoom F1 with SSH-6, H1n and some decent LAV’s, would be enough.